Getting Started
The following sections describe how to install, build and run NOS3 on your host computer.
Installing NOS3
On the host computer:
- Install Oracle VirtualBox v6.1+: https://www.virtualbox.org/
- Install Vagrant v2.2+: https://www.vagrantup.com/
- Install Git v1.8+: https://git-scm.com/downloads/
- Acquire the nos3 release repository via git clone
- Initialize git submodules for use:
git submodule init- Update git submodules:
git submodule update- Navigate to nos3/deployment
- Configure the CONFIG file in the deployment directory:
- In this file you can choose the configuration settings for the VM that will be created by Vagrant:
- Operating Systems are CentOS(1) and Ubuntu(2), although CentOS is currently not supported.
- Ground Systems are AIT(1) and COSMOS(2)
- Run the command
vagrant upvia a command prompt within the nos3/deployment directory, and wait for the command to return to the prompt. This can take anywhere from 20 minutes to hours depending on internet speeds and the specs of the host PC.
Startup
Once completed, allow the installer to finish its work. Be patient: 20mins - hours to complete.
Internet Access
IMPORTANT: Internet access is required when running. Also, please do NOT use the virtual machine until the installation process is complete.
Operating System
CentOS is currently not supported!
- Vagrant will automatically load the virtual machine to Virtual Box, and it will be ready for use. Login to the nos3 user using the password nos3123!
Login to the vagrant user using the password vagrant
Building Nos3
Log in to the NOS3 VM: nos3 / nos3123!
- Access the nos3 repository on the Host Machine. From the Guest:
- Use Virtual Box - Guest Additions CD Add
- Virtual box Menu > Devices > Shared Folder > Shared Folder Settings
- Add new Shared Folder and select the location of nos3 repo on host
- Check "Select Auto Mount" and "Make Permanent"
- Reboot VM
- Make and Install software
- Navigate to the nos3 shared folder after VM Reboot from Step 1e
- To access a Windows shared folder from Virtual Box, run
sudo add vagrant vboxsfand reboot - Check that vagrant provision has succeeded. If not, edit .yml: all roles > become: yes (sudoer)
- Navigate to the nos3 shared folder and nos3 parent directory
- Run
make
Running Nos3
Log in to the NOS3 VM: nos3 / nos3123!
- To prepare 42 for use, navigate to the /opt/ folder and run
sudo chown $USER 42/ - Navigate to the nos3 shared folder and nos3 parent directory
- To allow permissions for the launch and stop scripts, run
sudo chmod a+x gsw/scripts/launch.shandsudo chmod a+x gsw/scripts/stop.sh - Run
make launchin the nos3 parent directory from the terminal - To exit the simulation run
make stopfrom the terminal - To rebuild NOS3 from the repository baseline, first run
make cleanthenmake.
Startup
"NOS3 Flight Software" is the last component to startup.
Running Nos3 with AIT
Log in to the NOS3 VM: nos3 / nos3123!
- Open up a terminal
- cd into the AIT/AIT-CFS directory
- enter ait-gui –browser firefox
- This will start AIT and the –browser tells AIT to use FireFox for the Web Interface
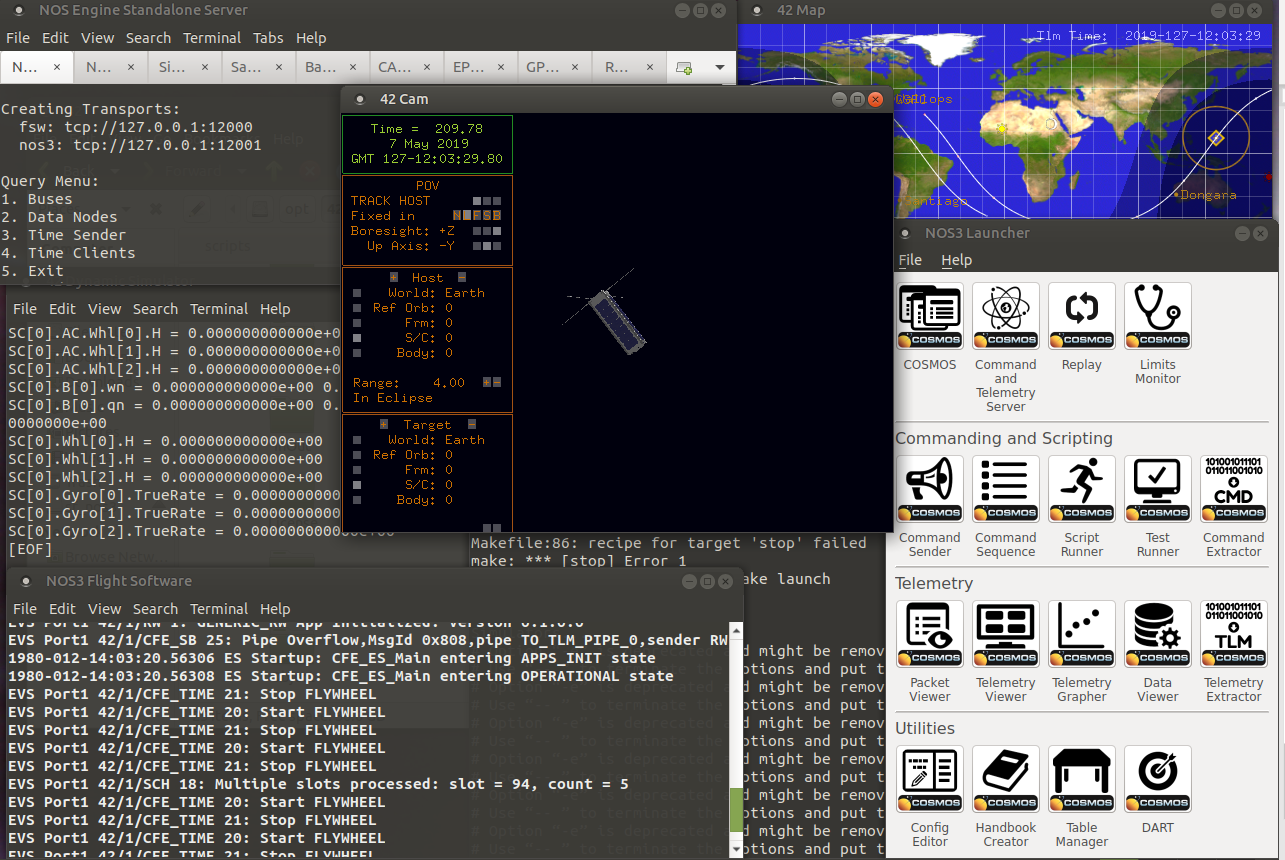
- Double click “nos3-run.sh”. The following software will start up:
- NOS Engine Standalone Server (1 terminal window)
- 42 Dynamic Simulator (1 terminal window, 1 GUI window with CubeSat, 1 GUI window with map)
- Simulators (1 terminal window with a tab for each simulator, including the NOS Time Driver and the Simulator Terminal)
- STF1 Flight Software (1 terminal window)
- Once flight software has started you can begin receiving telemetry after sedning the CFS_TO_OUTPUT_ENABLE with the IP address of 127.0.0.1
Running Nos3 with COSMOS
Log in to the NOS3 VM: nos3 / nos3123!
Once NOS3 is launched, the cFS flight software and COSMOS ground station will start.
COSMOS may command cFS to send telemetry back to COSMOS by:
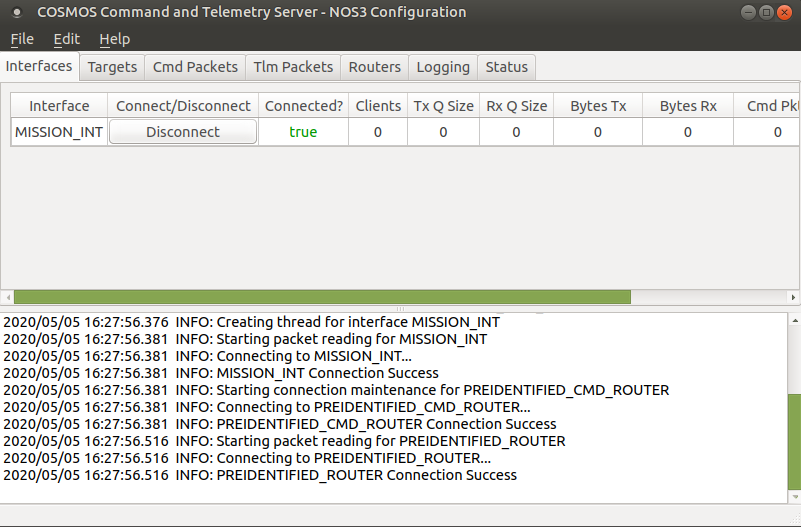
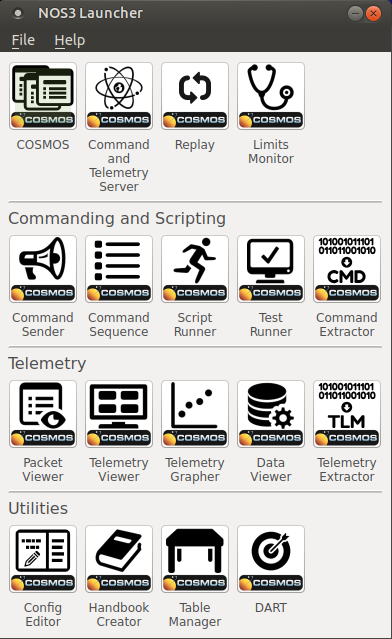
- Open the COSMOS Command and Telemetry Server and enter:
--config nos3_cmd_tlm_server.txt--system nos3_system.txt- The "Connected?" attribute should read true
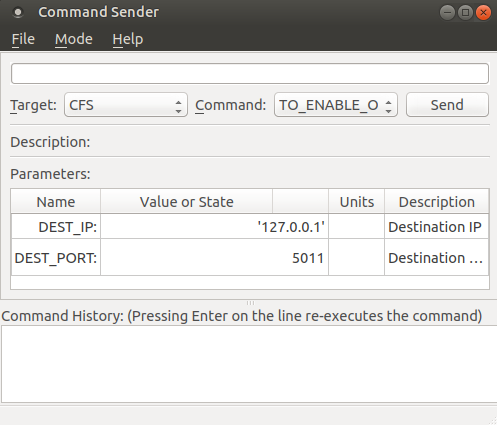
- Open COSMOS Command Sender, under "Commanding and Scripting" in the launcher
- In the Command Sender Options Window, enter
--system nos3_system.txt - In the Command Sender Window, select the target to be
CFS - Under Command, select
TO_ENABLE_OUTPUT_CC - Click
Send - Notice under COSMOS Command and Telemetry Server Window, the following data field updates:
- Bytes Tx and Cmd Pkts should change from 0 to a positive number
- Bytes Rx and Tlm Pkts should start counting up as telemetry is received
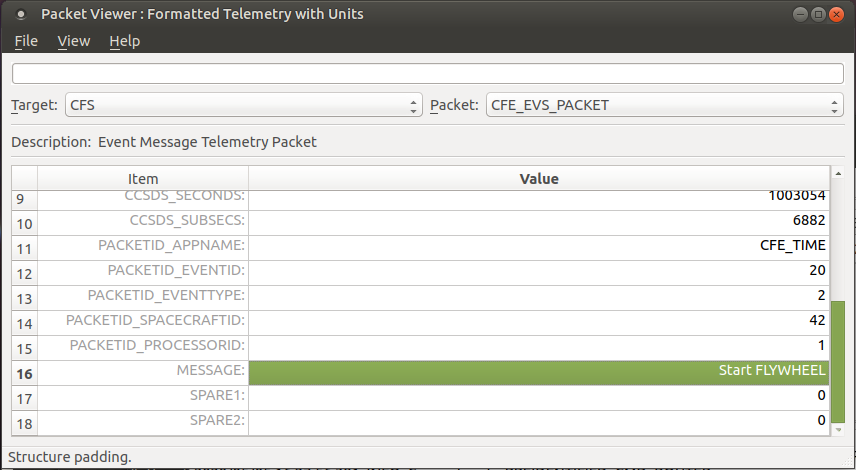
- Open COSMOS Packet Viewer
- In the Packet Viewer Options, enter
--system nos3_system.txt - Select the Target to be
CFSand Packet NameCFE_EVS_PACKET - Scroll to see the "Message" field live updates (Line 16)
- This may be repeated for other apps, once they are commanded to send telemetry
- Fields of applications which have not received telemetry packets are in fuchsia